Showing posts with label crafts. Show all posts

Monday, January 23, 2012

A Bathroom Rug and Fiber Basket: Craft Success!

Cutting up tees.
I completed the rug and fiber basket that I was making for my new bathroom (when we get our new place in Columbus). It matches our new fabric shower curtain and ceramic toothbrush holder I got from Etsy.


This was the most tedious part.
If you remember, I was creating these things really frugally, as my main material were old tee shirts no one wanted anymore (and were therefore free). These were stained, bleached, holey, and ill fitting and were in bad enough shape that I would not feel comfortable giving them to a thrift store to sell. What to do? Repurpose!


The backing, trimmed in purple
duck tape, with pattern
drawn on it.
I ended up spending about $15, which in the end will get me about three rugs (one latch hook, two crocheted) and a fiber basket. All I had to buy was a latch hook tool, a large plastic crochet hook, and the latch rug backing. Hooray for recycling!


Finished!
A close up.
I'm not gonna lie, the two crochet rugs are more rough looking (because they are made using small scraps of tee that are pieced together, rather than longer pieces of tee) to make into a continuous "yarn". I had scrap that I pieced together after I was done making the latch hook rug and figured, "Why not make throw rugs out of this?" They will be be perfect situated under my birds' cage to catch debris. I will take pics of those when I am done and show you those, too. But bird cage rugs don't have to be gorgeous- they have to be there to catch parrot poop. So I am pleased.

The basket.
The latch hook rug is gorgeous and awesome and ready for display (if only we had moved already!). It feels luxurious underfoot and will make an awesome bath mat. Rowan likes it too. It is being put away today, but everytime he saw me working on it he would say "Mommy rug- for NEW bathroom!". 

Yesterday, I went to the craft store and got a few more items that I am going to need for projects I have planned. I got some good fabric scissors to take with me (I have been borrowing the ones you see here!), as well as some waste canvas- for folks that do not do needlework, this allows you to embroider a patch onto clothing of anything that you want- making your clothes colorful and unique as well as mended in one fell swoop!
Another view of the basket.
I got some silver sequin trim and the letter "K" (the sequin trim is going to deck out the K - our family's last name initial) and will then be put into a baroque style frame (updated by spray painting with contemporary colors). This will be a part of a wall display of pictures and other memories of our family, which will be above a beloved dead altar and house altar for the main living space.

(I prefer beloved dead altars in dining areas- so that food and water offerings to ancestors are a natural extension of what you are already doing- feeding the living.) We may also place the piano in the dining room (We have a piano!) and place pictures of our living and dead there as well. If you remember, my beloved dead altar is pretty large and intense.

What are you working on?


Wednesday, December 14, 2011

Lessons from the Plat

Because things are very slow here in Appalachia, I have been using my extra time to be crafty- and one of the things that I have taken up again is embroidery. When searching for patterns on Etsy, I came across a listing for a Russian plat.

This is the "7 powers" design.
For those of you unfamiliar with Russian folk magic, a plat is a ceremonial towel- only used for ritual purposes- never as an ordinary towel (those are called roushniks). It is lovingly hand embroidered with specific patterns for specific purposes. They are talismans, to be specific. Plat patterns were passed orally from generation to generation, like most traditional Witchcraft tools and spells. The pattern on the plat I found was for the "seven basic powers" to bless the bearer, which is a great all-around plat to use in all kinds of work. (The seven basic powers roughly translate to the elements used in other magical systems: fire, earth, air, water, spirit, with the addition of intelligence and matter in the Russian system.)

I was excited to learn first hand about this Craft, so I went ahead and got the kit. Embroidering (or any specifically magical Craft) has many magical things to teach someone who is willing to listen. The pattern itself was a mind bending jumble of numbers. As I worked the pattern, I found that it instructed me about how the world is set up- by mathematical principles. Plat patterns only use ones, threes, fives and sevens (which are all very magical numbers that mean specific things) in their stitch and skip counts. A geometrical pattern emerges that creates symbols that invoke specific principles and powers. Math has always been at the foundation of all magical systems, but as someone who only does math when required (groan!), I never really appreciated its beauty before. That has changed.

This is what it looks like reversed.
In the pattern that I made, the stitches create X-like crosses that, in turn, crossed diamonds. These are ancient agricultural symbols of a grain field impregnated by the sun's energy (or the elements of fire and earth). Water is represented by the zig zag pattern above and below the diamonds. Air and Spirit are demonstrated by the white in the design, and Matter is shown by the use of red thread. The pattern shows Intelligence by the horned diamonds- they show basic construction, like a house.

I found myself frustrated in the beginning of the project, constantly referring to the pattern and groaning when I discovered that I missed a stitch and had to re-do a row. As I progressed, the pattern became more a part of me, and I intuitively knew what stitch came next- to complete the pattern. It felt as if the elements were coming home to rest in my little plat. And that is what I wanted, a true talisman of the elements, allowing me to use the towel in accordance with nature and the Flow.

For more information on Russian folk magic embroidery, check out Traditional Russian Costume.

Monday, October 3, 2011

October fun!

Now that I no longer own a business and am not paying rent, I have tons of time to spend with Rowan (and to implementing fun craft ideas). I have pinned tons of things on my Pinterest (feel free to follow me there!), including the pictures/ideas below. Here is what will fill fill my spare time in October!

1. Needlecraft
I am delighted to have some time in the evenings after Rowan goes to bed to embroider, cross stitch, knit, and crochet. I just finished my first cross stitch and am about to embark upon another (the "wild rumpus" scene from Maurice Sendak's Where the Wild Things Are, for Rowan's future room). I also plan on doing this hat for Rowan for the colder Ohio winters:

2. Nanny is making Rowan's costume for trick or treating (he will be an elephant this year), leaving me time for other Halloween/Samhain craftyness (like this):
Yes, that's a carved butternut squash. A squash that is now awesome!

3. Rowan is learning his colors and is starting to really love coloring. I bet he'll appreciate the tactile aspect of finger painting even more! I am going to be creating colored iced cubes for his bath fun time and making my own finger paints for him.


Do you DIY? What are you making these days?

Monday, May 16, 2011

Tangible Witchcraft: DIY Toiletries

At the turn of the secular year, I made a decision to try an all-natural solution for my hair: DIY shampoo and conditioner.

Not only do most shampoos and conditioners have all sorts of toxic crap in them (some quite dangerous), but they come in those plastic bottles that ruin the environment too. Did you know that for every pound of plastic produced there is a pound of toxic waste? And plastic recycling is a feel-good sham, frankly. I wanted to rid myself of that toxic burden (personally and for the planet), see if I could do something for myself, and save some money in the process.

I searched and searched and the easiest place to start was a simple solution for each:

Not Shampoo:
1 Tablespoon Baking Soda to 1 cup water

Baking soda is a natural alkaline that cleanses gently. While the "Nopoo" recipe above is more liquid-y than what most folks are used to when cleaning their hair, I find that using a squirt bottle directly aimed at the scalp and then rubbing the scalp (I have a round brush to massage my scalp in the shower- it feels awesome and cleans wonderfully!) does the same job, without overly stripping the hair. My hair runs dry if overwashed, so I stick with this basic recipe. If you try this recipe and find it does not get enough oil out, up the ratio of baking soda to water until it works for you.

Not Conditioner:
1 Tablespoon Apple Cider Vinegar to 1 cup water

Apple Cider Vinegar literally smooths the scales on hair to make it easy to comb through- it de-tangles even my snarly long hair! I apply it liberally all over my scalp and hair and let it sit for a moment before combing out my hair under running water. Tada- tangle free hair! Bonus- it leaves your hair smelling clean, but not scented. I find my hair kind of smells like strawberries.

The deodorant container I saved,
washed and ready to be filled.
So how did it work out? I was skeptical that these recipes could work for me, but you know what? They did. I bought the toiletry industry's line abouthow their products were irreplacable. I was duped!

Before, I was spending almost $10 a bottle on an all natural, SLS free, cruelty free shampoo and conditioner for my hair (that I had to go to a specialty store to get). Now, I spend pennies a month. I now no longer use any of those bought products, but simply use ingredients that are already in my kitchen (and temple) anyway.

Today, I decided to up the ante and create a deodorant for myself. Now, I am not the stinkiest girl, but I don't want to be either! Simply making others deal with my funk is not a good solution for me. So I found a new recipe, also simple:

Not Deodorant:
Coconut Oil, Baking Soda, and essential oils (optional).

Notice how I did not give ratios or measurements? It's because it widely varies on the coconut oil you are using and the temperature of the room that you are making it in. Don't panic- it is really an easy recipe.

1. Simply spoon out as much coconut oil as you think you will need (I make enough to fill a plastic deodorant dispenser that I kept from the last one I ever bought.)

My box of essential oils.
2. Add baking soda until it is a thick, stiff paste that will not fall off your fork (it defies gravity). You will be surprised at how much soda the oil will absorb to get to this point.

3. Then you can add essential oils if you wish.

Note: Just because you like the smell of a particular oil doesn't mean that you can use it in a deodorant. This is a sensitive place on the body- you should test to be sure your underarms can handle exposure to that ingredient before making a batch. (Use a carrier oil with a drop or two of the essential oil before applying to your underarms as a test.)

Note: You may need to keep the deodorant in the fridge in warmer weather, as coconut oil becomes liquid at very low temperatures.

All filled and ready for the fridge!
DIY is witchy, but you can get really witchy with this project, infusing the products with intention and ingredients to help manifest certain outcomes. Herbs, minerals, all kinds of ingredients can be added to the water, vinegar, or oil before making a product.

This, of course, adds a step and some time needs to elapse before assembling your toiletries (allowing the herb, mineral or what-have-you to steep and impart its properties to your medium). But it is worth it! Make yourself some money drawing, love-inducing, psychic-vision-enhancing toiletries!

My first batch of "Nopoo" was plain. Now I add herb vinegars to the water instead. My first batch of deodorant had a blend of vetivert, musk, and acacia oils. Can you guess my intent with those (besides smelling yummy)?

Thursday, December 16, 2010

Sacred Space

As a religious Witch, I am lucky enough to have a room set aside in my home as a temple. It is a permanent place to do ritual, spellwork, and sacred craft. I share the temple with my partner, who is also a Witch. So it is not completely "me" that way that sacred space used to be. But then again, I never had a while room to devote to religious practice before, either!

See the old soda crate to the right?
Back in the day, I was lucky to have one altar that would not be touched or messed with by roommates or lovers. For this purpose, I had an old wood soda crate (that used to cart around glass bottles) that would serve, upended, as my altar. Usually it would be on top of my dresser- as when you live with roommates, your bedroom is the only room that is "yours".

It would be draped in fabric, have hanging items suspended from it, and still other items would be nestled inside one of the cubbies (that used to house bottles of soda, but instead served as shelves for sacred statuary, items from nature, candles, and more.) I still use one of these in a larger altar to the beloved dead so that I can "go vertical" and cram more things into my altar space. (What can I say? I am a Taurus and also part magpie!)

But having a larger room has meant being able to have not just basic working tools out on the altar, but having a room of altars that all work together. Each divine being we work with has a special place- and in front of our "working altar" (that houses tools and things in process), I have a zafu and zabuton for my sitting practice.

I have a space for sacred crafts that I am working on- such as wands and masks. And I can always go in there, shut the door and know that my privacy and space will be respected by my partner.

Having a sacred space, set aside is a luxury that I enjoy. Do you have a sacred space? What makes it special to you?

Sunday, September 12, 2010

Tangible Witchcraft: Devotional Mask Making (Part Two)

Ishtar is coming together.
If you are just joining us, this is part two of this blog post. In part one, I go through most of the beginning steps on how to make a devotional mask and the hows and whys of my particular mask (of Lilith). I learned this craft so that I could then help others make theirs at the F(a)eri(e) Magic(k) Gathering, which I helped to organize this Labor Day weekend. (see related posts about that!)

Jared is making a jawless mask.
So after creating the outside of the mask and the wings, what was left? Well, for starters, I needed to attach the heavy wings somehow, and be sure that they created a veil that went all the way around my head (I wanted to be completely enclosed by Her energy in the mask). I also wanted to do some work on the inside of the mask- for the benefit of the wearer.

California Mugwort
So I started by taking some wildcrafted mugwort and steeping a strong infusion of it to paint on the inside of the mask. Mugwort is a strong plant ally in trance and dreaming work. Mugwort, also known as Motherwort, is sacred to moon goddesses (it is an emmenagogue, after all), and what is the moon but Lilith's Lantern?

Melisseus is painting his.
After that tea dried, I could embellish the inside of the mask as well. I blackened the inside so that I removed all distractions keeping me from engaging in the mask's purpose. Then I added the sigil that She gave me (it is on her sacred objects that I have made for Her before) to the forehead of the mask, on the inside, so that it covers my "third eye" when I wear the mask.


Three mask makers start the
embellishment process
Then I attached the wings with leather cord (I created 4 holes with an exacto knife in each wing, then laced them so make the stress point of attachment more diffuse, then attached each wing at two parts of the mask, tying the leather lace inside. I then reinforced the knot with some hot glue.

Then I needed to attach a cord to make the mask stay on, hands-free. I used a jacket cord (you know, the kind with a plastic slider on it?) instead of an elastic band. This is so my mask can get years of use without having to replace stretched out cord.

My mask is not yet complete in the pictures below, as the veil has not been attached and the wing edges were not covered - but this gives you an idea of the effect. Finally, after trying out the mask, Lilith told me that she wanted eye holes, as she wanted to move while talking and be able to approach people of her choosing. So I created some.

Just the right amount of fright
A profile look.
We used the masks in ritual that night, invoking who we worked with into the circle. I plan on using my mask in a more quiet way, as an aid in oracular work and to sit with Her in quiet moments, mainly.

Monday, September 6, 2010

Tangible Witchcraft: Devotional Mask Making (Part One)

My lovely friend elfin (who edits and writes for this blog) came over the other day to make devotional masks with us. What is a devotional mask, you ask? It is a mask that is made of and with a specific deity for the purpose of communing with them, gaining information from them, and working with them further. It can be used in a ritual context, an oracular context, or even in a trance when you are alone (with the deity). My mask is for oracular and communal work mainly, so no eye holes are needed, just nose and mouth.

The way that the process works is deceptively simple (although the materials are specific and you need assistance- you cannot do this work alone!):

1. You create a plaster mask base using quick drying plaster strips (the brand we used is called Rigid Wrap) on your own face. The book that we used to help with the nuts and bolts process was this one (to the left!). The book simplifies the process and materials needed so that you can concentrate on the trance work and embellishment part of the mask making process. I liked that a whole lot (as this is a craft project with a sacred purpose)!

You need to pick a specific deity with which you want to work and of which you want to make a mask. Often, they come to you, so you will probably not have a hard time deciding!

2. Then as your helper applies the plaster to your face, you enter a trance state (if desired, your helper can assist with that part, too) where you meet and interact with that God/dess. You have their energy and essence fill you for some time as the mask hardens on your face. The whole process for this step takes 20-30 minutes per mask.

3. When it is time for the mask to be removed, you sit up and blow the energy of the God/dess out of your body and into the mask, enlivening it and creating a link to that God/dess in the seemingly inanimate object. This will help you use the mask in devotional and ritual work with this particular God/dess. This mask is of my patroness, Lilith (as she is commonly called).

Cast of Lily's face
Be warned- this is a messy project. Wear clothes you don't mind getting messy and know that a shower afterwards is a good idea, as you are using lotions and petroleum jelly and such to keep the plaster from sticking to your skin and ripping out your eyebrows. My partner has a full beard, so you can imagine how goopy his face was for this project!

4. Once the mask is set but not completely dry, trim the edges (it's easier while it is still slightly damp).

Rowan finds a witchlet "hat"
at the craft store!
5. After you let it dry completely, the embellishment begins! Remember what information was given to you in trace, visually and energetically, and try and make that come across in how you decorate the mask. 6. A shopping trip may be in order, as the items that you assembled beforehand may not seem as appropriate after the trance. I know that I saw things that I wanted to incorporate into my mask that I did not have on hand- so off we went, looking for items!

I picked up some things at an ordinary craft store (hot glue gun and sticks, lichens and moss, colored tissue paper, Outdoor Mod Podge adhesive), some things I already had (what can I say? I am crafty!), and some things at specialty stores (shark teeth, beetle wings). I have a huge vase filled with feathers that I have been collecting from all my bird friends over the years, so that helped with this project as well.

Candle lit for God Herself
7. After the mask dried, I created sacred space for the embellishment process (which took and is taking several sessions- I am creating this mask for a camp that I am attending Labor Day weekend and it will be used both as an example for others to make their masks, and in ritual at camp.). I do all my sacred crafts in sacred space. It helps me enter trance so much easier. Often I just run with what I am getting in the moment and when I am done I am surprised at the results!

A beak added.
First thing I did to my mask was to create a beak instead of a nose. I did this with clay that air dries, although you could use more plaster strips to do the same thing if you have an armature for support. Then I  cut up some old jeans and created wing shapes to that I could embellish them with the feathers. Notice that I also taped the edges of the mask. This will be covered over in the final product.

First feather layer
Then as the clay beak dried, I worked on the wings, which will be a back to the mask- like flaps that enclose my head completely.

I used regular Elmer's glue (thickly applied) on the first set of feathers, which were more downy and meant to be a general cover.

The yellow of the beak is
also tissue paper
After the beak was dry, it was time to cover the mask. Rather than paint, I opted for colored tissue paper and Outdoor formula Modge Podge (which has the advantage for collage artists of being both a glue and a finish!). I wanted all my mask materials to be natural (as Gods are forces of nature!)- so rather than acrylic paint, I used paper. The colors I picked were symbolic- my patroness calls herself "the Lady of Blood and Moonlight" - so I picked a red the color of exposed blood. For moonlight, I chose a special silver glitter made in Germany- which is not plastic but glass. It reflects and refracts light so much more intensely than plastic and is better for the environment. After this step was done, I found that the wings were dry and I could start again on the wings, adding the heavier feathers.

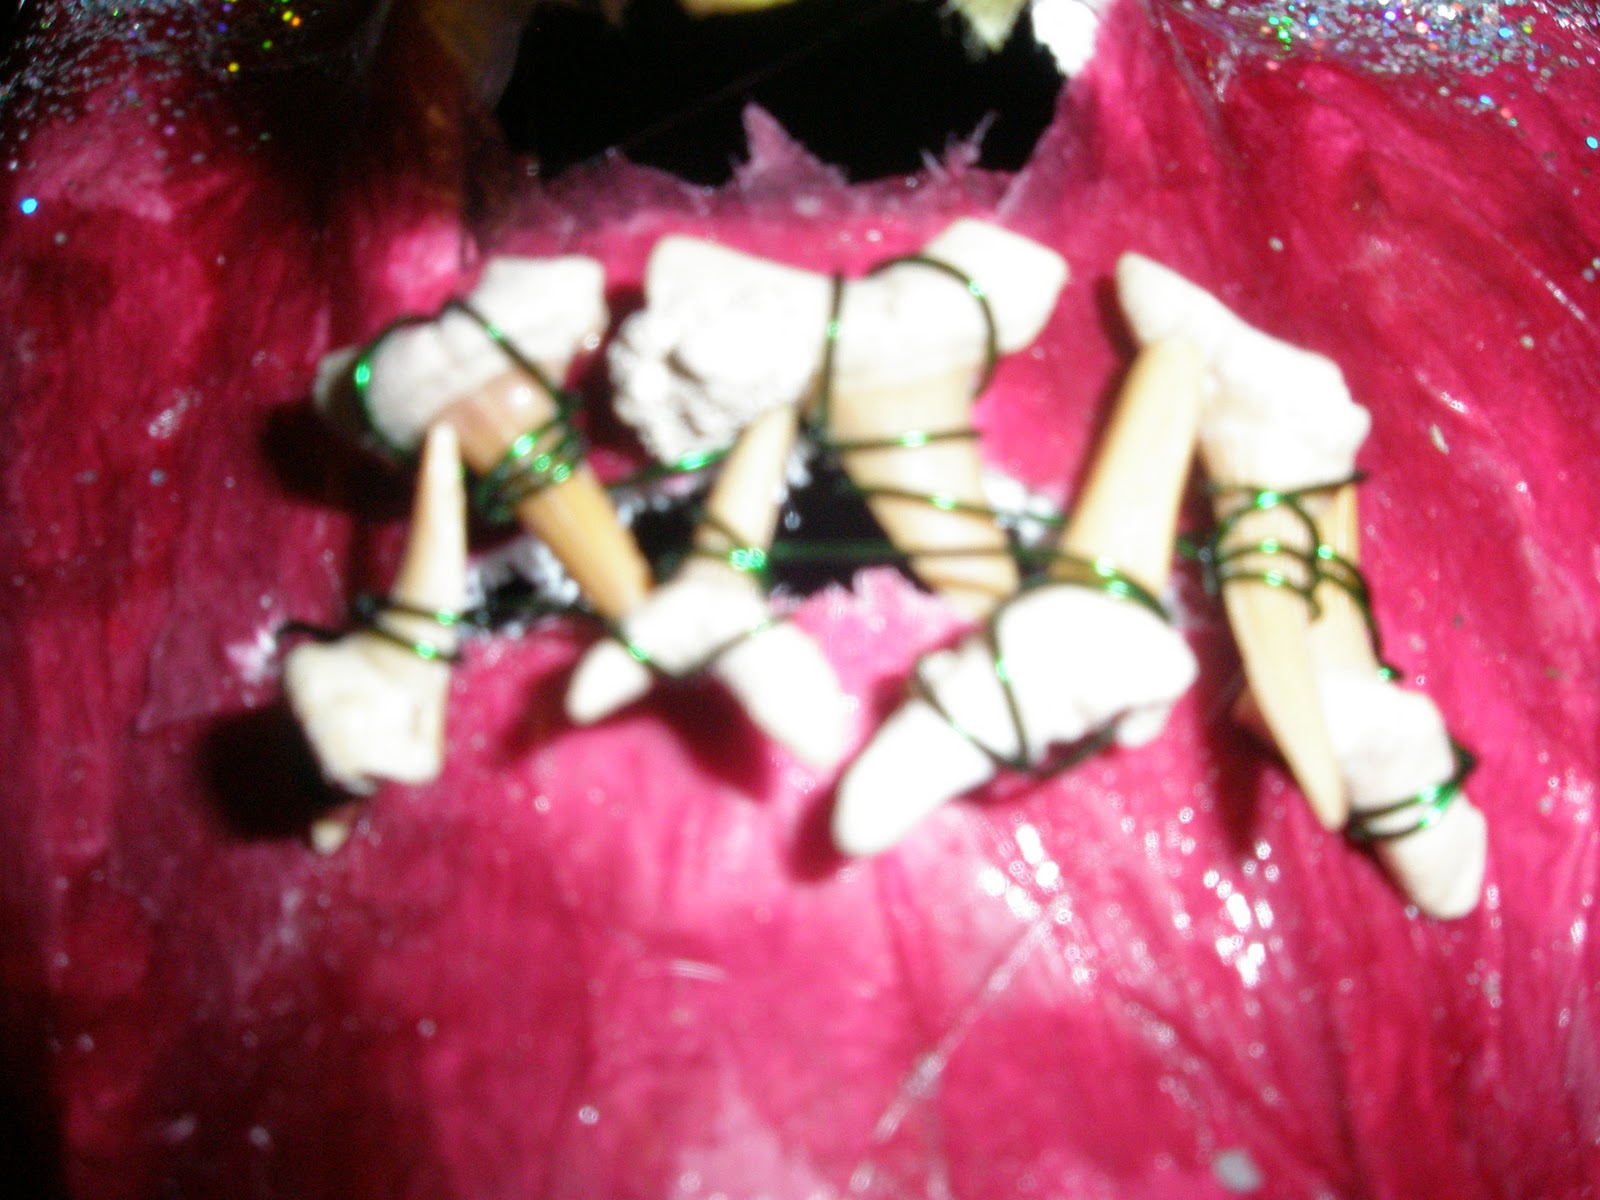
I used parrot feathers of all colors for this project as well as lichen and beetle wings on the forehead. For these steps, I used the hot glue gun and LOTS of glue. Then I was able to wire the shark's teeth into a mouth shape and attach them to the mask. Final pictures (for now) of the wings and mask:
multi-color wings
almost finished!
really bad orthodontia.
Next steps (in a future blog post): finish the edges of the wings, attach them to the back of the mask, create an elastic strap to hold the mask in place, and wearing the mask! I'll talk about helping others make theirs and using mine in a ritual context.

Hope you had as much fun reading as I did making! Stay tuned for part two!